AI-Powered Text Transliteration and NER API
A REST API built with FastAPI and Google's Gemini API for transliterating text, extracting named entities, and handling .docx files.
AI-Powered Text Transliteration and NER API
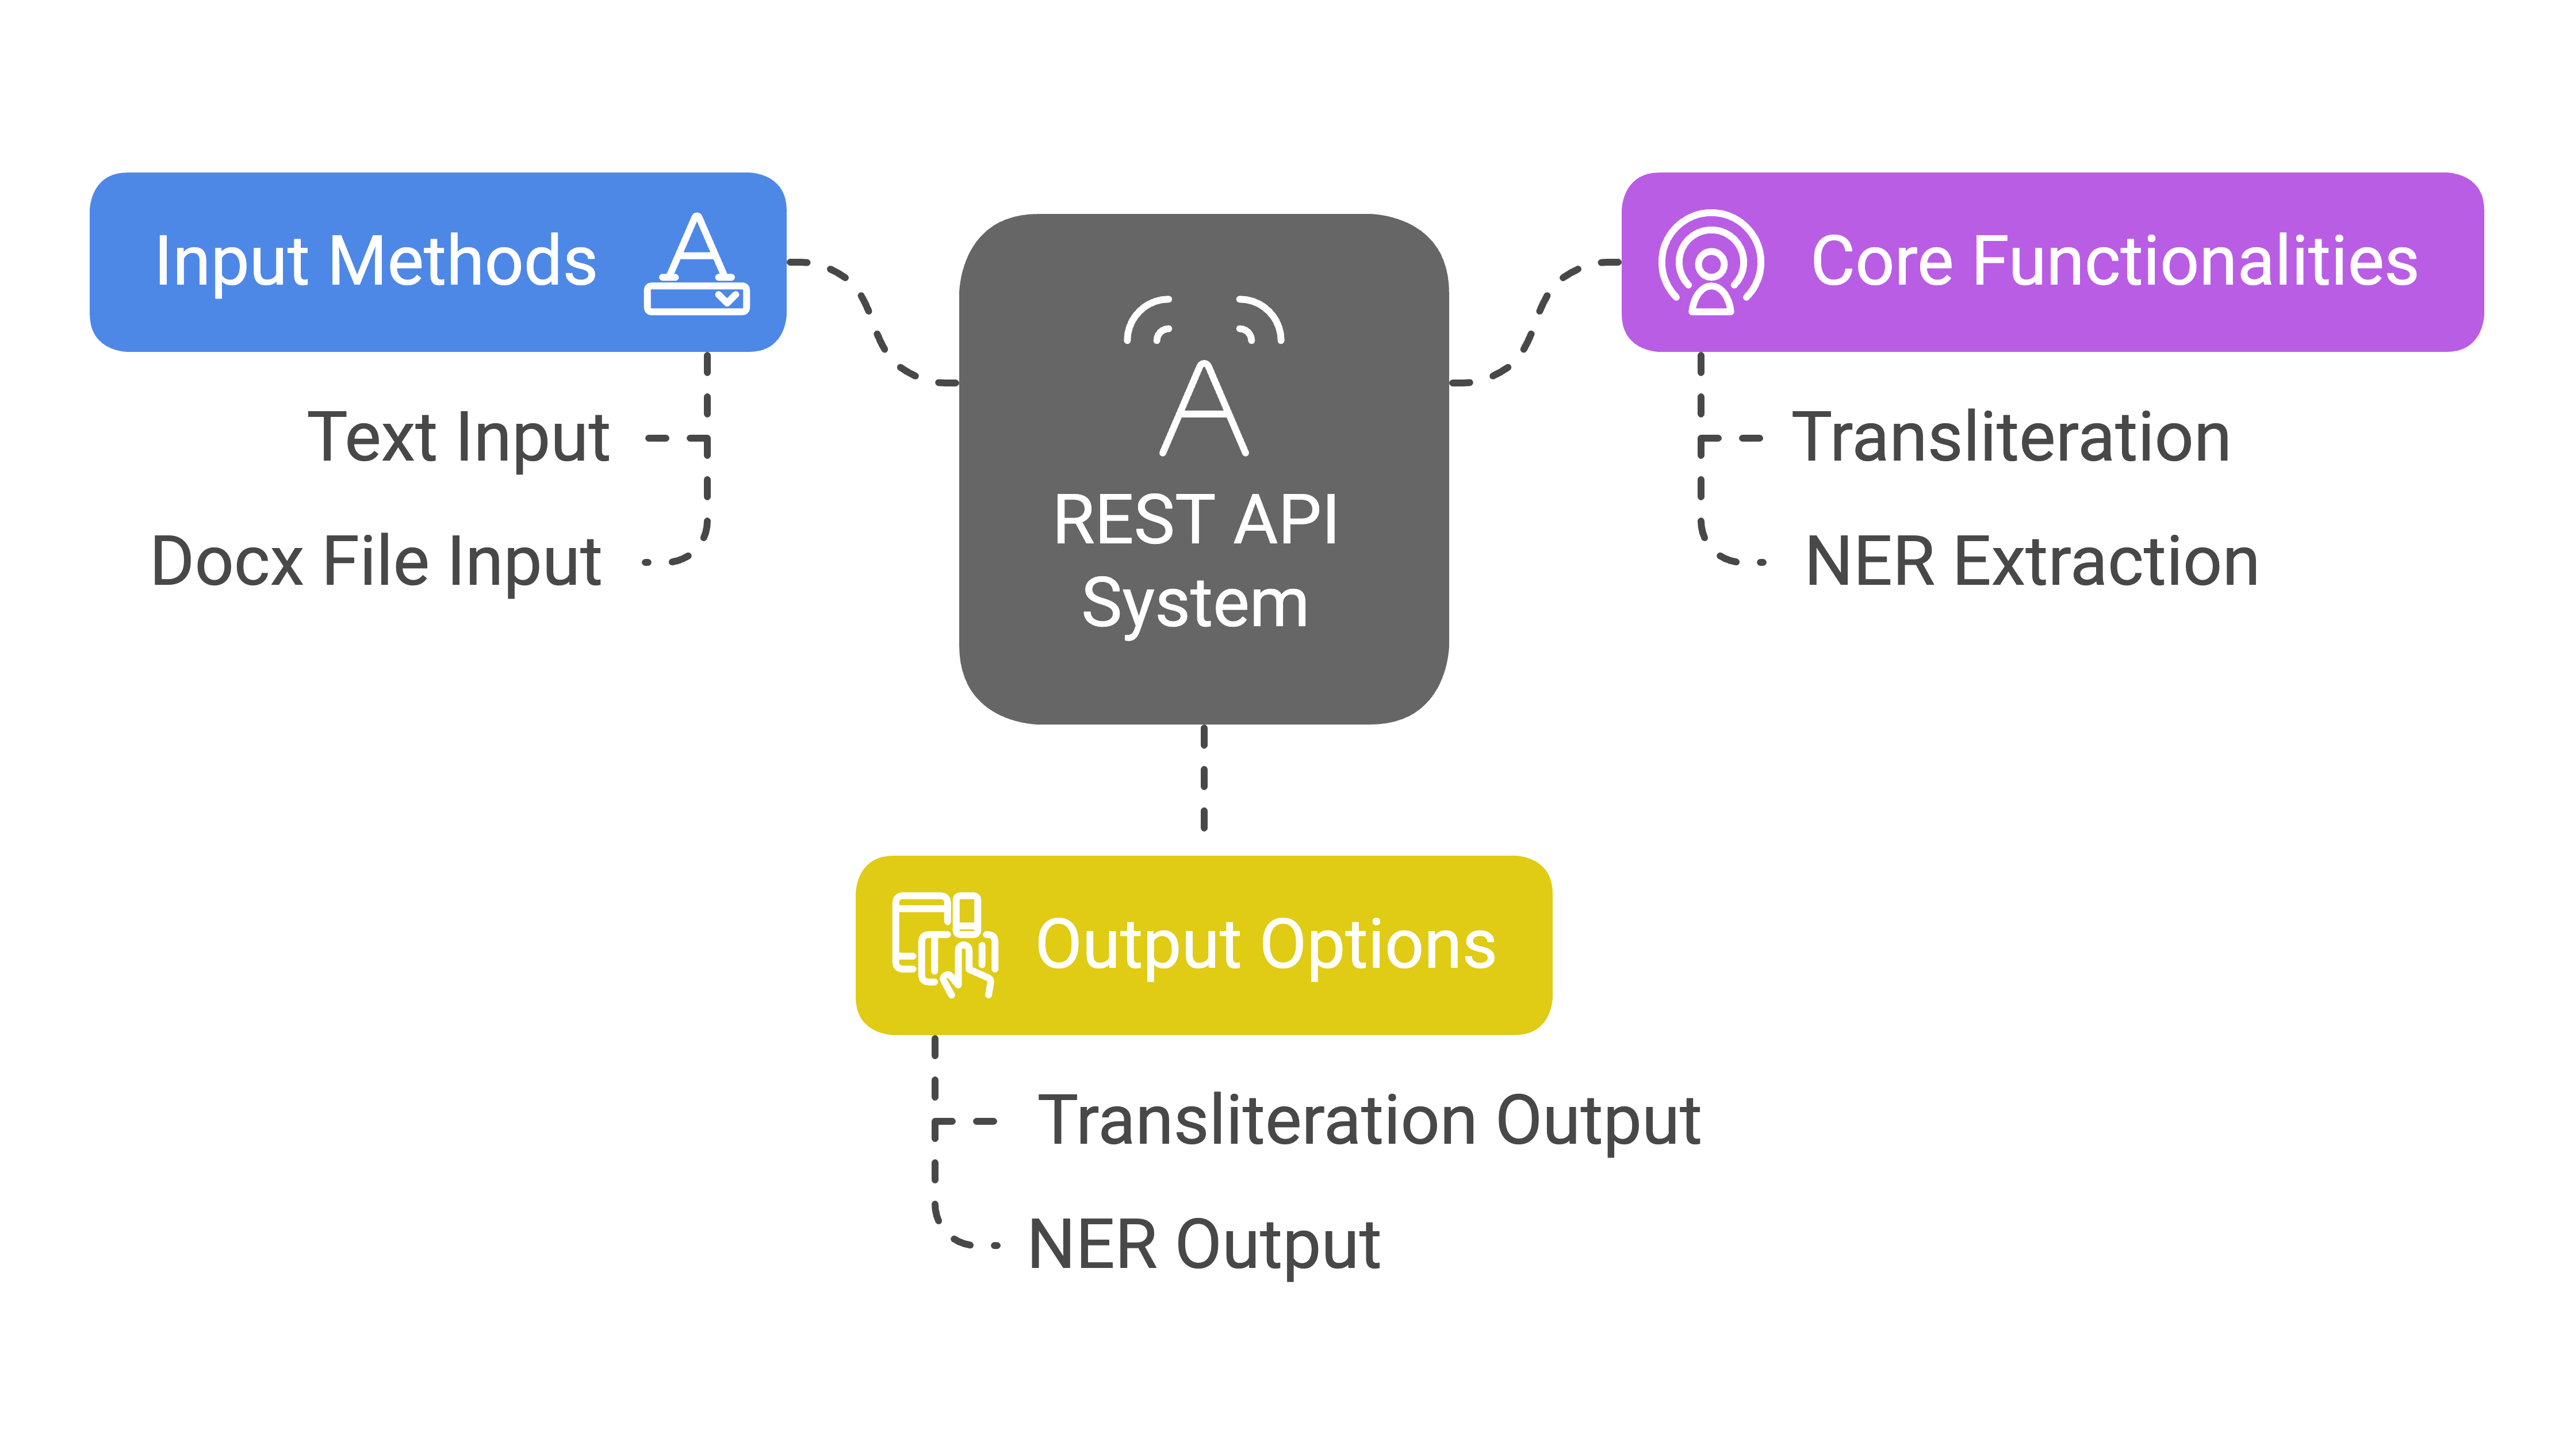
This project provides a REST API for transliterating text and extracting named entities (NER), powered by Google’s Gemini API and FastAPI. It supports text and docx file inputs, offering transliteration to a specified output language, and NER extraction with transliteration.
Features
- Text Transliteration: Converts text from a source language to a target language (script).
- File Transliteration: Extracts text from
.docxfiles and transliterates it. - Named Entity Recognition (NER): Extracts named entities (people, organizations, locations, etc.) from
.docxfiles. - NER Transliteration: Transliterates identified named entities to the target language.
- API Endpoints: Well-defined REST API endpoints using FastAPI.
- Environment Variables: Uses
.envfiles to manage API keys and configuration.
Prerequisites
Before you begin, ensure you have the following installed:
- Python 3.8+: (Recommended: 3.13 or higher)
- Git: For cloning the repository.
- uv: For dependency management (see installation instructions below)
Setup Instructions
Here are the step-by-step instructions to set up and run the project:
1. Clone the Repository
First, clone the project from GitHub using the following command:
1
2
git clone https://github.com/Okramjimmy/gemini_transliteration.git
cd gemini_transliteration
2. Install uv
uv is a blazing-fast Python package installer and resolver. Choose one of the following installation methods that best fits your operating system:
macOS and Linux:
1
curl -LsSf https://astral.sh/uv/install.sh | sh
Windows:
1
powershell -ExecutionPolicy ByPass -c "irm https://astral.sh/uv/install.ps1 | iex"
Alternative Installation (Using pip or pipx):
If you prefer, you can also install uv using:
1
2
3
4
5
# With pip:
pip install uv

# Or with pipx:
pipx install uv
After installation, you can update uv to the latest version using:
1
uv self update
3. Create a Virtual Environment (Optional but Highly Recommended)
While uv doesn’t directly manage virtual environments like venv or virtualenv, it’s still a good practice to work inside a virtual environment. You can create one using the following commands:
1
2
3
4
5
6
7
8
# Create the virtual environment
python -m venv venv

# Activate it (Linux/macOS)
source venv/bin/activate

# Activate it (Windows)
.\venv\Scripts\activate
4. Install Dependencies Using uv sync
Once you have uv installed, use uv sync to install project dependencies. This command reads your pyproject.toml file and installs all necessary packages. Ensure your pyproject.toml file is in the root directory of your project.
1
uv sync
Note: The project dependencies are specified in the pyproject.toml file. There’s no need to manually create requirements.txt.
5. Create a .env file
Create a .env file in the root of your project directory. Add the necessary environment variables as follows:
GEMINI_API_KEY="YOUR_GEMINI_API_KEY"
INPUT_LANG="English"
OUTPUT_LANG=""
LLM_MODEL="gemini-1.5-pro-latest"
Important:
- Replace
YOUR_GEMINI_API_KEYwith your actual Google Gemini API key. - Set the
INPUT_LANGandOUTPUT_LANGvariables to the source and target languages for your transliteration. - Set the
LLM_MODELvariable to the google gemini model you would like to use. If you have access to it, you can change it togemini-1.5-pro-latest.
6. Run the Application
Finally, run the FastAPI application using uvicorn:
1
uv run uvicorn main:app --host 0.0.0.0 --port 8000 --reload
mainrefers to the name of the python file where your FastAPI app instance is declared (in your casemain.py)apprefers to theFastAPI()app variable declared inside themain.py--host 0.0.0.0: Makes the application accessible from any IP address.--port 8000: Specifies the port number for the application.
The API should now be running and accessible at http://0.0.0.0:8000.
API Endpoints
The application provides the following API endpoints:
- POST
/transliterate/text: Transliterates input text.- Input:
text(string) in form data. - Output: JSON response with
original_textandtransliterated_text.
- Input:
- POST
/transliterate/file: Transliterates text from a.docxfile.- Input:
file(file) in form data. - Output: JSON response with
original_textandtransliterated_text.
- Input:
- POST
/ner: Extracts and transliterates named entities from a.docxfile.- Input:
file(file) in form data. - Output: JSON response with
entities(key-value pair where keys are the original entities and values are the transliterated entities)
- Input:
Example usage
You can test the api using CURL commands or any http client like Postman.
Transliterate Text
1
curl -X POST -F "text=Hello, how are you?" http://0.0.0.0:8000/transliterate/text
Transliterate File
1
curl -X POST -F "file=@path/to/your/document.docx" http://0.0.0.0:8000/transliterate/file
Named Entity Recognition
1
curl -X POST -F "file=@path/to/your/document.docx" http://0.0.0.0:8000/ner
Error Handling
The API has basic error handling in place. The API will return appropriate error messages with status codes when any error is encountered.
Note:
- Make sure the path to the file you are passing in curl commands are correct.
Contributing
Contributions are welcome! Please fork the repository and submit a pull request with your changes.
License
This project is licensed under the Okram Jimmy License.